[Qt Widgets version] qtdemo/simplezoomscroll.cpp
#include <QApplication>
#include <QPushButton>
#include <math.h>
#include "simplezoomscroll.h"
SimpleZoomScroll::SimpleZoomScroll(QWidget *parent) :
QDialog(parent)
{
//
// Set up the GUI
//
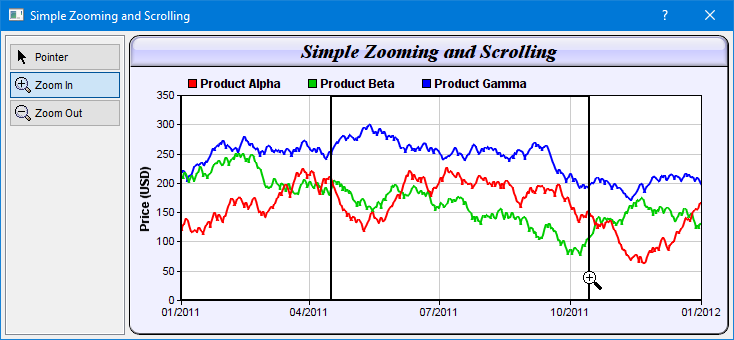
setFixedSize(732, 308);
setWindowTitle("Simple Zooming and Scrolling");
// The frame on the left side
QFrame *frame = new QFrame(this);
frame->setGeometry(4, 4, 120, 300);
frame->setFrameShape(QFrame::StyledPanel);
// Pointer push button
QPushButton *pointerPB = new QPushButton(QIcon(":/icons/scroll_icon.png"), "Scroll", frame);
pointerPB->setGeometry(4, 8, 112, 28);
pointerPB->setStyleSheet("QPushButton { text-align:left; padding:5px}");
pointerPB->setCheckable(true);
// Zoom In push button
QPushButton *zoomInPB = new QPushButton(QIcon(":/icons/zoomin_icon.png"), "Zoom In", frame);
zoomInPB->setGeometry(4, 36, 112, 28);
zoomInPB->setStyleSheet("QPushButton { text-align:left; padding:5px}");
zoomInPB->setCheckable(true);
// Zoom Out push button
QPushButton *zoomOutPB = new QPushButton(QIcon(":/icons/zoomout_icon.png"), "Zoom Out", frame);
zoomOutPB->setStyleSheet("QPushButton { text-align:left; padding:5px}");
zoomOutPB->setGeometry(4, 64, 112, 28);
zoomOutPB->setCheckable(true);
// The Pointer/Zoom In/Zoom Out buttons form a button group
mouseUsage = new QButtonGroup(frame);
mouseUsage->addButton(pointerPB, Chart::MouseUsageScroll);
mouseUsage->addButton(zoomInPB, Chart::MouseUsageZoomIn);
mouseUsage->addButton(zoomOutPB, Chart::MouseUsageZoomOut);
connect(mouseUsage, SIGNAL(buttonPressed(QAbstractButton*)),
SLOT(onMouseUsageChanged(QAbstractButton*)));
// Chart Viewer
m_ChartViewer = new QChartViewer(this);
m_ChartViewer->setGeometry(128, 4, 650, 350);
connect(m_ChartViewer, SIGNAL(viewPortChanged()), SLOT(onViewPortChanged()));
//
// Initialize the chart
//
// Load the data
loadData();
// Initialize the QChartViewer
initChartViewer(m_ChartViewer);
// Initially set the mouse to drag to scroll mode
pointerPB->click();
// Trigger the ViewPortChanged event to draw the chart
m_ChartViewer->updateViewPort(true, true);
}
SimpleZoomScroll::~SimpleZoomScroll()
{
delete m_ranSeries;
delete m_ChartViewer->getChart();
}
//
// Load the data
//
void SimpleZoomScroll::loadData()
{
// In this example, we just use random numbers as data.
m_ranSeries = new RanSeries(127);
m_timeStamps = m_ranSeries->getDateSeries(1827, Chart::chartTime(2007, 1, 1), 86400);
m_dataSeriesA = m_ranSeries->getSeries(1827, 150, -10, 10);
m_dataSeriesB = m_ranSeries->getSeries(1827, 200, -10, 10);
m_dataSeriesC = m_ranSeries->getSeries(1827, 250, -8, 8);
}
//
// Initialize the QChartViewer
//
void SimpleZoomScroll::initChartViewer(QChartViewer *viewer)
{
// Set the full x range to be the duration of the data
viewer->setFullRange("x", m_timeStamps[0], m_timeStamps[m_timeStamps.len - 1]);
// Initialize the view port to show the latest 20% of the time range
viewer->setViewPortWidth(0.2);
viewer->setViewPortLeft(1 - viewer->getViewPortWidth());
// Set the maximum zoom to 10 points
viewer->setZoomInWidthLimit(10.0 / m_timeStamps.len);
}
//
// The ViewPortChanged event handler. This event occurs if the user scrolls or zooms in
// or out the chart by dragging or clicking on the chart. It can also be triggered by
// calling WinChartViewer.updateViewPort.
//
void SimpleZoomScroll::onViewPortChanged()
{
if (m_ChartViewer->needUpdateChart())
drawChart(m_ChartViewer);
if (m_ChartViewer->needUpdateImageMap())
updateImageMap(m_ChartViewer);
}
//
// Draw the chart and display it in the given viewer
//
void SimpleZoomScroll::drawChart(QChartViewer *viewer)
{
// Get the start date and end date that are visible on the chart.
double viewPortStartDate = viewer->getValueAtViewPort("x", viewer->getViewPortLeft());
double viewPortEndDate = viewer->getValueAtViewPort("x", viewer->getViewPortLeft() +
viewer->getViewPortWidth());
// Get the array indexes that corresponds to the visible start and end dates
int startIndex = (int)floor(Chart::bSearch(m_timeStamps, viewPortStartDate));
int endIndex = (int)ceil(Chart::bSearch(m_timeStamps, viewPortEndDate));
int noOfPoints = endIndex - startIndex + 1;
// Extract the part of the data array that are visible.
DoubleArray viewPortTimeStamps = DoubleArray(m_timeStamps.data + startIndex, noOfPoints);
DoubleArray viewPortDataSeriesA = DoubleArray(m_dataSeriesA.data + startIndex, noOfPoints);
DoubleArray viewPortDataSeriesB = DoubleArray(m_dataSeriesB.data + startIndex, noOfPoints);
DoubleArray viewPortDataSeriesC = DoubleArray(m_dataSeriesC.data + startIndex, noOfPoints);
//
// At this stage, we have extracted the visible data. We can use those data to plot the chart.
//
///////////////////////////////////////////////////////////////////////////////////////
// Configure overall chart appearance.
///////////////////////////////////////////////////////////////////////////////////////
// Create an XYChart object 600 x 300 pixels in size, with pale blue (0xf0f0ff) background,
// black (000000) rounded border, 1 pixel raised effect.
XYChart *c = new XYChart(600, 300, 0xf0f0ff, 0, 1);
QColor bgColor = palette().color(backgroundRole()).rgb();
c->setRoundedFrame((bgColor.red() << 16) + (bgColor.green() << 8) + bgColor.blue());
// Set the plotarea at (52, 60) and of size 520 x 205 pixels. Use white (ffffff) background.
// Enable both horizontal and vertical grids by setting their colors to grey (cccccc). Set
// clipping mode to clip the data lines to the plot area.
c->setPlotArea(52, 60, 520, 205, 0xffffff, -1, -1, 0xcccccc, 0xcccccc);
// As the data can lie outside the plotarea in a zoomed chart, we need to enable clipping.
c->setClipping();
// Add a top title to the chart using 15 pts Times New Roman Bold Italic font, with a light blue
// (ccccff) background, black (000000) border, and a glass like raised effect.
c->addTitle("Simple Zooming and Scrolling", "Times New Roman Bold Italic", 15
)->setBackground(0xccccff, 0x0, Chart::glassEffect());
// Add a legend box at the top of the plot area with 9pts Arial Bold font with flow layout.
c->addLegend(50, 33, false, "Arial Bold", 9)->setBackground(Chart::Transparent, Chart::Transparent);
// Set axes width to 2 pixels
c->yAxis()->setWidth(2);
c->xAxis()->setWidth(2);
// Add a title to the y-axis
c->yAxis()->setTitle("Price (USD)", "Arial Bold", 9);
///////////////////////////////////////////////////////////////////////////////////////
// Add data to chart
///////////////////////////////////////////////////////////////////////////////////////
//
// In this example, we represent the data by lines. You may modify the code below to use other
// representations (areas, scatter plot, etc).
//
// Add a line layer for the lines, using a line width of 2 pixels
LineLayer *layer = c->addLineLayer();
layer->setLineWidth(2);
// In this demo, we do not have too many data points. In real code, the chart may contain a lot
// of data points when fully zoomed out - much more than the number of horizontal pixels in this
// plot area. So it is a good idea to use fast line mode.
layer->setFastLineMode();
// Now we add the 3 data series to a line layer, using the color red (ff0000), green
// (00cc00) and blue (0000ff)
layer->setXData(viewPortTimeStamps);
layer->addDataSet(viewPortDataSeriesA, 0xff0000, "Product Alpha");
layer->addDataSet(viewPortDataSeriesB, 0x00cc00, "Product Beta");
layer->addDataSet(viewPortDataSeriesC, 0x0000ff, "Product Gamma");
///////////////////////////////////////////////////////////////////////////////////////
// Configure axis scale and labelling
///////////////////////////////////////////////////////////////////////////////////////
// Set the x-axis as a date/time axis with the scale according to the view port x range.
viewer->syncDateAxisWithViewPort("x", c->xAxis());
// In this demo, we rely on ChartDirector to auto-label the axis. We ask ChartDirector to ensure
// the x-axis labels are at least 75 pixels apart to avoid too many labels.
c->xAxis()->setTickDensity(75);
///////////////////////////////////////////////////////////////////////////////////////
// Output the chart
///////////////////////////////////////////////////////////////////////////////////////
delete viewer->getChart();
viewer->setChart(c);
}
//
// Update the image map
//
void SimpleZoomScroll::updateImageMap(QChartViewer *viewer)
{
// Include tool tip for the chart
if (0 == viewer->getImageMapHandler())
{
viewer->setImageMap(viewer->getChart()->getHTMLImageMap("", "",
"title='[{dataSetName}] {x|mmm dd, yyyy}: USD {value|2}'"));
}
}
//
// The Pointer, Zoom In or Zoom out button is pressed
//
void SimpleZoomScroll::onMouseUsageChanged(QAbstractButton *b)
{
m_ChartViewer->setMouseUsage(mouseUsage->id(b));
}
[QML/Qt Quick version] qmldemo/simplezoomscroll.qml
import QtQuick
import QtQuick.Window
import QtQuick.Controls
import advsofteng.com 1.0

Window {
    title: "Simple Zooming and Scrolling"
    visible: true
    modality: Qt.ApplicationModal
    width: 730
    minimumWidth: 730
    maximumWidth: 730
    height: 310
    minimumHeight: 310
    maximumHeight: 310

    Pane {
        id: leftPane
        width: 120
        padding: 5
        anchors.top: parent.top;
        anchors.bottom: parent.bottom;

        Column {
            Button {
                width: 110
                contentItem: Row {
                    padding: 2; leftPadding: 5
                    Image { source: "icons/scroll_icon.png"; width:16; height:16; }
                    Text { text: "  Pointer"; font.pixelSize: 13; }
                }
                checked: viewer.mouseUsage == QmlChartViewer.MouseUsageScroll
                onClicked: viewer.mouseUsage = QmlChartViewer.MouseUsageScroll
            }
            Button
            {
                width: 110
                contentItem: Row {
                    padding: 2; leftPadding: 5;
                    Image { source: "icons/zoomin_icon.png"; width:16; height:16; }
                    Text { text: "  Zoom In"; font.pixelSize: 13; }
                }
                checked: viewer.mouseUsage == QmlChartViewer.MouseUsageZoomIn
                onClicked: viewer.mouseUsage = QmlChartViewer.MouseUsageZoomIn
            }
            Button {
                width: 110
                contentItem: Row {
                    padding: 2; leftPadding: 5
                    Image { source: "icons/zoomout_icon.png"; width:16; height:16; }
                    Text { text: "  Zoom Out"; font.pixelSize: 13; }
                }
                checked: viewer.mouseUsage == QmlChartViewer.MouseUsageZoomOut
                onClicked: viewer.mouseUsage = QmlChartViewer.MouseUsageZoomOut
            }
        }
    }

    QmlChartViewer
    {
        id: viewer
        anchors.left: leftPane.right
        anchors.leftMargin: 5
        y: 5
        // set default mouse usage to scroll and mouse wheel to zoom
        mouseUsage: QmlChartViewer.MouseUsageScroll
        mouseWheelZoomRatio: 1.1
        // Update chart on viewport change
        onViewPortChanged: {
            if (needUpdateChart) demo.drawChart(this);
            if (needUpdateImageMap) demo.updateImageMap(this);
        }
    }

    // The backend implementation of this demo.
    SimpleZoomScrollDemo {
        id: demo;
    }

    Component.onCompleted: {
        demo.initChartViewer(viewer);
        viewer.updateViewPort(true, true);
    }
}
[QML/Qt Quick version] qmldemo/simplezoomscroll.cpp
#include "simplezoomscroll.h"
#include <chartdir.h>
#include <math.h>


SimpleZoomScroll::SimpleZoomScroll(QObject *parent) : QObject(parent)
{
    m_currentChart = 0;

    // Load the data
    loadData();
}

SimpleZoomScroll::~SimpleZoomScroll()
{
    delete m_ranSeries;
    delete m_currentChart;
}

//
// Load the data
//
void SimpleZoomScroll::loadData()
{
    // In this example, we just use random numbers as data.
    m_ranSeries = new RanSeries(127);
    m_timeStamps = m_ranSeries->getDateSeries(1827, Chart::chartTime(2007, 1, 1), 86400);
    m_dataSeriesA = m_ranSeries->getSeries(1827, 150, -10, 10);
    m_dataSeriesB = m_ranSeries->getSeries(1827, 200, -10, 10);
    m_dataSeriesC = m_ranSeries->getSeries(1827, 250, -8, 8);
}

//
// Initialize the QChartViewer
//
void SimpleZoomScroll::initChartViewer(QmlChartViewer *viewer)
{
    // Set the full x range to be the duration of the data
    viewer->setFullRange("x", m_timeStamps[0], m_timeStamps[m_timeStamps.len - 1]);

    // Initialize the view port to show the latest 20% of the time range
    viewer->setViewPortWidth(0.2);
    viewer->setViewPortLeft(1 - viewer->getViewPortWidth());

    // Set the maximum zoom to 10 points
    viewer->setZoomInWidthLimit(10.0 / m_timeStamps.len);
}

//
// Draw the chart and display it in the given viewer
//
void SimpleZoomScroll::drawChart(QmlChartViewer *viewer)
{
    // Get the start date and end date that are visible on the chart.
    double viewPortStartDate = viewer->getValueAtViewPort("x", viewer->getViewPortLeft());
    double viewPortEndDate = viewer->getValueAtViewPort("x", viewer->getViewPortLeft() +
        viewer->getViewPortWidth());

    // Get the array indexes that corresponds to the visible start and end dates
    int startIndex = (int)floor(Chart::bSearch(m_timeStamps, viewPortStartDate));
    int endIndex = (int)ceil(Chart::bSearch(m_timeStamps, viewPortEndDate));
    int noOfPoints = endIndex - startIndex + 1;

    // Extract the part of the data array that are visible.
    DoubleArray viewPortTimeStamps = DoubleArray(m_timeStamps.data + startIndex, noOfPoints);
    DoubleArray viewPortDataSeriesA = DoubleArray(m_dataSeriesA.data + startIndex, noOfPoints);
    DoubleArray viewPortDataSeriesB = DoubleArray(m_dataSeriesB.data + startIndex, noOfPoints);
    DoubleArray viewPortDataSeriesC = DoubleArray(m_dataSeriesC.data + startIndex, noOfPoints);

    //
    // At this stage, we have extracted the visible data. We can use those data to plot the chart.
    //

    ///////////////////////////////////////////////////////////////////////////////////////
    // Configure overall chart appearance.
    ///////////////////////////////////////////////////////////////////////////////////////

    // Create an XYChart object 600 x 300 pixels in size, with pale blue (0xf0f0ff) background,
    // black (000000) rounded border, 1 pixel raised effect.
    XYChart *c = new XYChart(600, 300, 0xf0f0ff, 0x000000, 1);
    c->setRoundedFrame(Chart::Transparent);

    // Set the plotarea at (52, 60) and of size 520 x 205 pixels. Use white (ffffff) background.
    // Enable both horizontal and vertical grids by setting their colors to grey (cccccc). Set
    // clipping mode to clip the data lines to the plot area.
    c->setPlotArea(52, 60, 520, 205, 0xffffff, -1, -1, 0xcccccc, 0xcccccc);

    // As the data can lie outside the plotarea in a zoomed chart, we need to enable clipping.
    c->setClipping();

    // Add a top title to the chart using 15 pts Times New Roman Bold Italic font, with a light blue
    // (ccccff) background, black (000000) border, and a glass like raised effect.
    c->addTitle("Simple Zooming and Scrolling", "Times New Roman Bold Italic", 15
        )->setBackground(0xccccff, 0x0, Chart::glassEffect());

    // Add a legend box at the top of the plot area with 9pts Arial Bold font with flow layout.
    c->addLegend(50, 33, false, "Arial Bold", 9)->setBackground(Chart::Transparent, Chart::Transparent);

    // Set axes width to 2 pixels
    c->yAxis()->setWidth(2);
    c->xAxis()->setWidth(2);

    // Add a title to the y-axis
    c->yAxis()->setTitle("Price (USD)", "Arial Bold", 9);

    ///////////////////////////////////////////////////////////////////////////////////////
    // Add data to chart
    ///////////////////////////////////////////////////////////////////////////////////////

    //
    // In this example, we represent the data by lines. You may modify the code below to use other
    // representations (areas, scatter plot, etc).
    //

    // Add a line layer for the lines, using a line width of 2 pixels
    LineLayer *layer = c->addLineLayer();
    layer->setLineWidth(2);

    // In this demo, we do not have too many data points. In real code, the chart may contain a lot
    // of data points when fully zoomed out - much more than the number of horizontal pixels in this
    // plot area. So it is a good idea to use fast line mode.
    layer->setFastLineMode();

    // Now we add the 3 data series to a line layer, using the color red (ff0000), green
    // (00cc00) and blue (0000ff)
    layer->setXData(viewPortTimeStamps);
    layer->addDataSet(viewPortDataSeriesA, 0xff0000, "Alpha");
    layer->addDataSet(viewPortDataSeriesB, 0x00cc00, "Beta");
    layer->addDataSet(viewPortDataSeriesC, 0x0000ff, "Gamma");

    ///////////////////////////////////////////////////////////////////////////////////////
    // Configure axis scale and labelling
    ///////////////////////////////////////////////////////////////////////////////////////

    // Set the x-axis as a date/time axis with the scale according to the view port x range.
    viewer->syncDateAxisWithViewPort("x", c->xAxis());

    // In this demo, we rely on ChartDirector to auto-label the axis. We ask ChartDirector to ensure
    // the x-axis labels are at least 75 pixels apart to avoid too many labels.
    c->xAxis()->setTickDensity(75);

    ///////////////////////////////////////////////////////////////////////////////////////
    // Output the chart
    ///////////////////////////////////////////////////////////////////////////////////////

    delete viewer->getChart();
    viewer->setChart(m_currentChart = c);
}

//
// Update the image map
//
void SimpleZoomScroll::updateImageMap(QmlChartViewer *viewer)
{
    // Include tool tip for the chart
    if (0 == viewer->getImageMapHandler())
    {
        viewer->setImageMap(viewer->getChart()->getHTMLImageMap("", "",
            "title='[{dataSetName}]\n{x|mmm dd, yyyy}: USD {value|2}'"));
    }
}
© 2023 Advanced Software Engineering Limited. All rights reserved.